Producing a high quality Facebook Live stream from an average computer
Note: This is an evolving post on a topic that I am still learning about, and consequently, I will be likely updating it often. Please forgive the flaky intro as I am focusing on the technical details for now. This post assumes that the reader understands Facebook Stream keys and how to plug them into OBS.
Recently, I was asked to help produce a stream of a live music concert on Facebook. After a bit of research, I found Open Broadcaster Studio.
OBS (Open Broadcaster Studio) is a free and open source application for streaming and recording video. Use this instead of allowing the browser to record directly from your webcam in order to get the best control over the stream quality and content.
After first installing OBS, I found it a relatively easy task to setup a webcam video source and plug in a Facebook Stream key. However, this resulted in a stream whose quality was quite inconsistent and often unusable. After digging into the options and doing a bit of reading, I found the settings below produced a good quality stream without bogging down my machine too much.
Open Broadcaster Studio Settings
In the program preferences, I set the following settings:
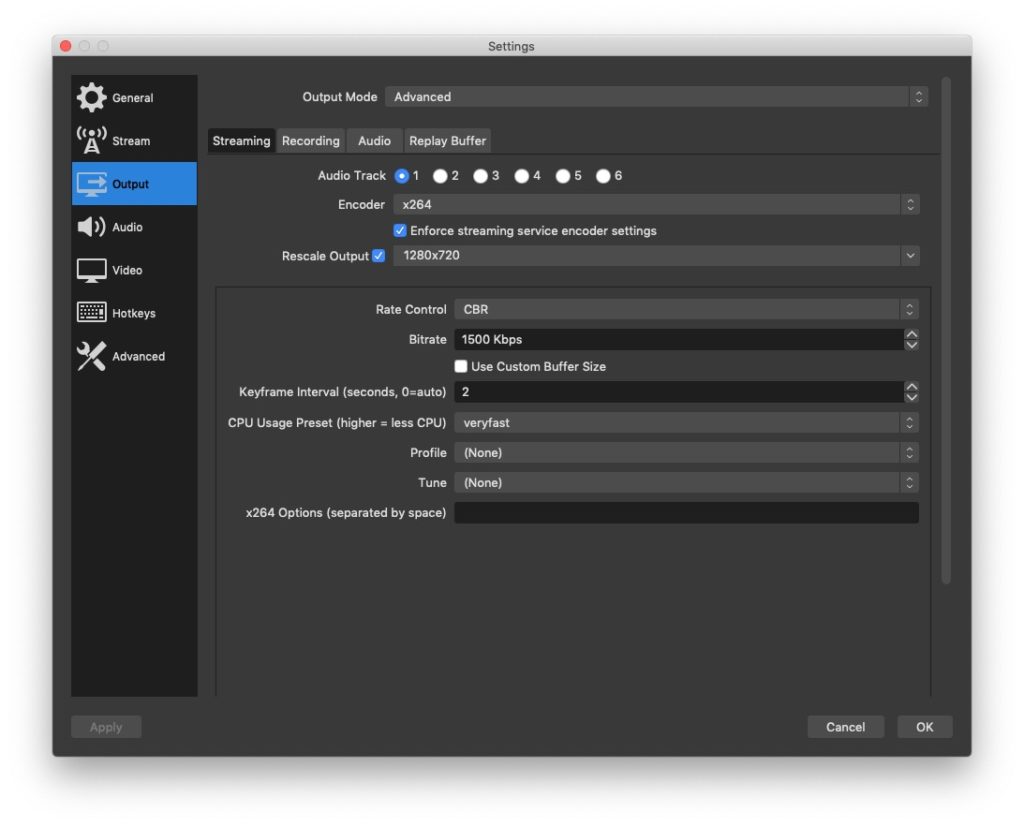
Output ➝ Streaming
- Set Rescale Output to 1280×720
- Set Rate Control to CBR (Constant Bitrate) and Bitrate to 1500 (kbps)
- Keyframe Interval to 2 (keyframes/second)
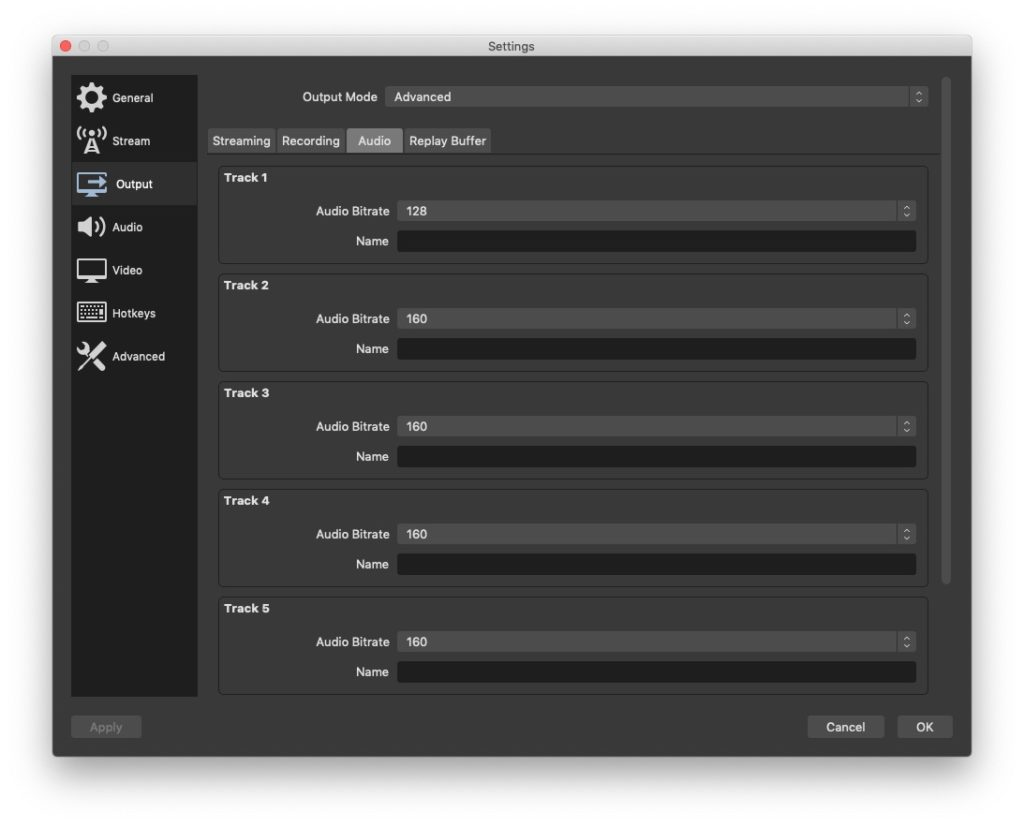
Output ➝ Audio
- Set the Bitrate of all tracks you have to 128 (kbps). (I only had 1)
Audio
- Sample Rate set to 44.1 Khz
- Channels set to Stereo
- Confirm the audio input devices

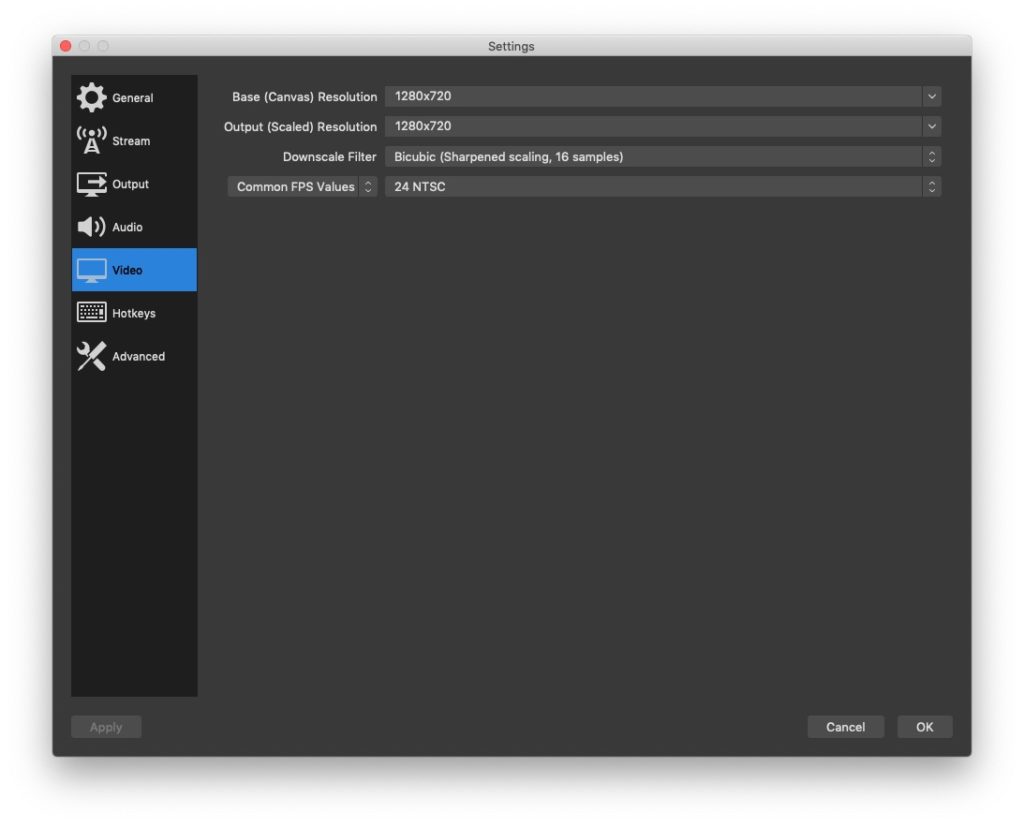
Video
- Set the Base Canvas and Output (Scaled) Resolution resolution to 1280×720
- Set Framerate to 24FPS
Use one machine to stream and another to Go Live on Facebook
OBS has the ability to stream video directly to Facebook using the Stream Key option.
When going live on Facebook, there seems to be a lot going on in the browser, not least of which is a live video preview. This isn’t normally a big deal unless your machine is also working in the background on producing that same stream as it is if you’re using OBS.
Maybe it’s because I have underpowered hardware, but I found when I used my desktop (2015 iMac / 1.6GHz / 8GB Ram) to run OBS and stream to Facebook and to also control the stream on Facebook, the video quality (or the stream quality?) seemed to randomly drop. To get around this, I used my desktop to run OBS, and then logged into Facebook on my laptop to “Go Live” and manage the broadcast. With this setup, the resulting video had much more consistent quality and virtually no stutter, both when it was live and after it was saved in the Facebook timeline.
Keep twiddling the knobs
This isn’t meant to be a definitive guide to how to build the BEST stream, but rather how I got my stream to be ACCEPTABLE. There are many variables at play when live streaming video and I’m still experimenting with how to boost the quality within the constraints of my existing average-level hardware and internet connection. If I find any new tips in the course of my tests, I will surely update this post.
Also, for reference, most of what I’ve learned so far have been from the links below.